Sunday, 31 May 2015

Festival Inspired Make-Up

Hey ladies, 
hope everyone's Sunday is a lazy as mine, currently lying in bed with a hot bottle and a hungover boyfriend ready to watch Harry Potter :) I actually do not miss going out what so ever. Okay don't get me wrong there's been times when all I want to do is go cray but then when I'm at home in my jammies eating everything in sight I'm actually happier than a pig in shit! And when I look at the dying head on my boyfriend I don't envy him in the slightest! 


Anyway, while all you lovely people where living it up at Slane and Forbidden Fruit I decided to play with my make-up and do a festival look that I would wear if I was off on my travels for the weekend. It's obviously not for everyone but I thought I'd share it anyway. The photos I took are courtesy of my phone which does not pick up any of the contour or highlight or most of the colours on my eyes, I really need to invest in a new camera, but for now please bare with me! 


The shadows I used are all by Urban Decay, I have a few of their palettes and find the pigmentation really strong, however there is a good bit of fall out when you'r applying the shades so best to save foundation until last, however I did not do this for this look and learned the hard way! 

So first I started with my base, my foundation, highlight and contour. For anyone reading I have done a previous post on my highlight and contour routine so I won't go into much detail about that.  

I always fill in my brows before I do my eye make-up,I've been using Rimmel eyebrow pencil in 002 and then I apply some concealer above and beneath the brow to give it better definition. I then applied my eye shadow base, for this I used Urban Decays eye shadow primer in the colour Eden. I love this stuff it actually holds your eye shadow all day, it literally will not budge! 


The first colour I used was from the Urban Decay Deluxe palette in the shade ransom (1), and I just applied that to my crease as the transition colour. I then used the colour Blackcurrent (2) from the Naked3 palette and applied that all over my lip with a flat brush to pack on the colour. I went back to the Deluxe palette and used the colour Fishnet (3) to smoke out the edges with, and I also applied this mixed with Blackcurrent under the lower lash line. I then applied some Mac Kohl eye pencil, tight lining my eye. I then applied some liquid liner, I used Rimmels liquid liner in black, and then applied a coating of my Lancome Hypnose Mascara. 


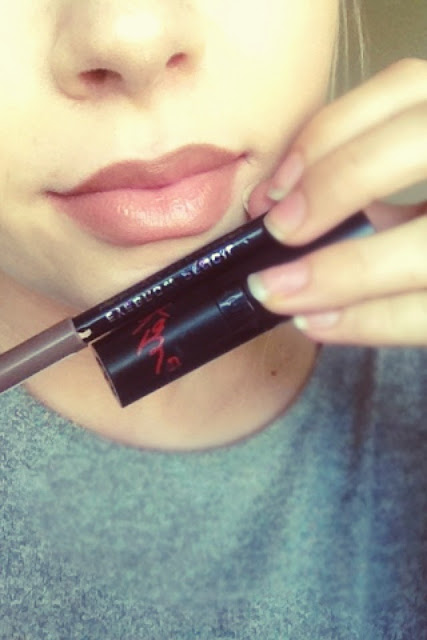
For my lips I used my Rimmel eyebrow pencil to line, and Macs lipstick in the colour Myth along with a nude Revlon lip gloss. I haven't a clue what the colour is I found it in my make-up case so decided to throw some on! 


The bindi which isn't really a bindi but a metallic tattoo, is from Pennys featured in my festival essentials post. Be warned, I stuck this on just for the crack and had to get my boyfriend to try and scrape it off! Great staying power for festivals, not so great when you'r roaming about the house in your pjs, he thought it was hilarious and said I looked like 'Medusa'!. 


And that was the look finished! 


Thanks for reading,
Love BV xx

Friday, 29 May 2015

Top 10 Festival Essentials

Hey everyone, 
so seeing as Slane and Forbidden Fruit are on this weekend and of course I'm housebound ..sad face... while all my girls are off on their travels, I decided to to do a blog post on Festival essentials which are all from Pennys! 

There is absolutely no point what so ever in spending a shit load on you'r festival bits when guaranteed there going to be wrecked by the time you stumble home and in fairness you're not going to want to look at the shit stained bag and wellies you had for the day or weekend! So I've picked a few things that tick all the boxes but at a reasonable price. 


1.  Bag
I uploaded a picture last week of this back pack on my Instagram and people went crazy looking for it. It comes in a black version as well and they're only €13.00. A back pack is honestly the handiest thing to through all your bits into and when you'r on top of someone's shoulders giving it loads, switch it around and it can be used as a drink holder! Everyone is rocking the tassels at the minute so on trend and a bargain! 


2. Bum Bag
Not everyone's cup of tea but I love them!! They hold your phone, money, and there so secure there's no fear of some prick trying to rob you! This bad boy is only €7.00. 


3. Hat
Nothing makes me feel more like a festival chick than a trilby. Don't ask me why but when I have it on and a pair of shades I like to think I'm a bit of a bad bitch like Kate Moss. Great for hiding you'r manky hair after a few days on the session and also stops your hair from getting wet or if in the rare case it's actually Sunny it will protect the scalp. Just make sure to hold onto it as there's always one gobshite who will try and rob it! This pretty little one is just €4.00 so even if you do loose it, no tears my friends!


4. Sunglasses
Everyone loves a pair of shades, you can do all the creeping you want. These bad boys are just €1.50 and as there not Ray Bans who gives a shite if they break? Even if it isn't sunny it will hide your extremely drunk self. Hey resting bitch face!! 


5. Face Wipes
Definitely a must, if you're there for the weekend or just for the day, a girlo can get a bit sweaty, nothing worse than the smell of sweat of someone! Great for the loo as well, horrible festival toilets always run out of toilet roll and tbh I'd rather find a nice quiet area and drop it like it's hot than actually use the porter loos at concerts, there so rank it makes me sick. Speaking of sick if anyone needs a tactical puke these are great for cleaning the mess up as well and there only €1.50!


6. Hair Brush, Hair Bobbins, Dry Shampoo


 So if that prick has stole your hat, it's best to be prepared, spray a bit of dry shampoo on the wig (€1.90) , give it a brush ( €1.50 this wee brush is actually a de-tangler) and tie it up (€1.50) and you're good to go! 


7. Lip Balm
I need this in my life at all times anyway, my lips are always dry. You'r skin and lips get so dehydrated from all the beer and lack of water so it's handy to have this in your bag nothing worse than chapped lips and if you'r on the vodski it will sting like a bitch! Investment at €1.50 and smells fabulous! 


8. Socks


Weather your're there for the day or the weekend, you will give yourself a pat on the back when you can ditch the smelly wet socks and put on a fresh pair. I remember coming home from my first Oxegen years ago and I just wanted to take my wellies and socks off but didn't have the brains to think of bringing any more socks. My feet were all water marked and just felt horrible. So ladies, feel like the smug bitch when your friend is still wearing her manky ones and you'r as fresh as a daisy! Or you can be sound and give her a pair as there is five in this pack and they're only €3.00!


9. Plimsolls
Not the most fab but when all you want to do is ditch the wellies for the journey home they do the job. I actually felt like Beyonce when I had my new clean runners and socks on, after the weekend of living in shitty wellies you will think you're the bees knees and these are only €3.00! 


10. Toothbrush & Toothpaste


Again it doesn't matter if you're there for the day or weekend to me this is well and truly up there as an essential. The amount of times I've kicked myself for not bringing one with me for the day, especially after all the tactical pukes it's an investment and at €1.50 it's hardly breaking the bank! 


So that's my top 10 Festival essentials, giving you've already invested in a decent raincoat and a pair of wellies, However I also have to add a few more, such a woman take everything but the kitchen sink! But I could not not include these few things, first are the metallic tattoos I love them soooooo much and have bought a few packs from pennys and haven't got the chance to wear them yet. There only €2.00 and come in loads of different designs and look fab with a tan! And when I seen all the celebs wearing them I just wanted an excuse to buy them!


Last but not least is a cup! Yea ok not a huge essential but it's got a handle and a straw and a lid ten times better than the plastic cups they give you at the drink tents and it prevents any spillages! It's €3.00 and you will feel very smug when all the lads are spilling the five euro pints all over the place! Also if you'r a lightweight and can't down a pint split it with you'r bestie and sip until you'r hearts content! 


I hope everyone has a ball this weekend or any other festival weekend and I hope this helped some of you festival goers. Be strong troopers and represent for all of us staying at home! 

Thanks for reading
Love BV xx


Friday, 22 May 2015

Cheap & Cheerful

Hi everyone,
So yesterday I did a 90's nude lip and I used two cheap and cheerful very affordable products. There's so much hype around high end products but there's so many good and affordable products out there people tend to over look them. Don't get me wrong I love all high end products, who doesn't? but sometimes when the money isn't in full flow it's nice too know that you can pop to the local chemist and get something just as good for a fraction of the price! 

The two products I used are both from Rimmel, I picked them up one of the days just browsing in boots and there such good dupes! The first is actually an eyebrow pencil, it's their professional eyebrow pencil in 002 Hazel. It's actually just as good as any Mac liner I've used. It's really long lasting, a little goes a long way and I'm getting a lip liner and an eyebrow pencil all in one!

The second product is from their Kate Moss range and its the lasting finish lipstick in the shade 003. I think it's a great dupe of Macs Velvet Teddy, the highly sought after colour that Kylie Jenner uses. Now it's not as matte it does have a sheen to it but a wee tip, dab a pit of powder on the centre and bobs your uncle! 

The brow pencil cost about €4.99 and the lipstick was around €8.99 so a total money saver comparing too what you'd pay if you where buying Mac. 

I actually didn't use much lipstick in these two photos I just dabbed a little on and used some Vaseline over it because my lips are as dry these days. 


I just put some on again and took a quick snap so you can see the shade better. To me its a great dupe, I was really surprised at how strong the pigmentation was. Well done Rimmel totes impressed! 

Thanks for reading ladies,
Love BV x


Tuesday, 19 May 2015

Highlight & Contour Routine

Hey Ladies, 
So I've had a desperate nights sleep, this little man was so active last night and I was in and out to the loo every half hour because of the way he is lying on my bladder, I'm not feeling the best today and my skin looks like crap  so I decided to do a post on my highlight and contouring routine and how I fake a glow when my skin is looking dull. Again for those of you reading I'm no professional I'm just giving you's some info and tips on how I achieve the best results, so lets get started! 


1.  So first I start with my foundation. I've already prepped and primed my skin so after my products have settled on my skin I go in with my foundation. The foundation I'm using at the moment is the MAC Studio Sculpt Spf 15 foundation in NC20. This is my first time trying this foundation and so far it's been good on my skin. It's specifically aimed at people with dull/dry skin. It's a gel-based foundation with a medium buildable coverage. It's not my favourite foundation I've ever used as I find it quite yellow toned and it's not as dewy as I'd like it to be, it actually sets like a matte foundation. Anyway I apply this all over my face using the Real Techniques buffing brush, I used different brushes to put on this foundation but found this brush worked the best with the thick consistancy of the foundation.


2. Then for my highlight I use the Crown Concealer Palette using the first shade on the top of the palette under my eyes, the middle of my forehead, over my top lip and also on my chin. 

3. I then use the first colour on the bottom left of the Crown palette to highlight the bridge of my nose and just above my jaw bone. The reason I use this second colour is because I don't like the contrast to be too obvious when I'm highlighting and contouring I like the shades to blend together so this is the reason I use a different colour for these areas. I do step 2 and 3 using the Real Techniques eye-shadow base shadow brush. I have the Real Techniques concealer brush but I prefer to use this brush instead because it allows for more precise application of the product. 


                                                                                          4. I then go in with MAC studio sculpt concealer in NC15 using the same brush. I like to go over my highlight with my concealer because it adds a more dewy look and also gives more coverage. A little of this stuff goes a long way. I apply this under my eyes, and the the centre of my forehead. I blend this out by using the Real Techniques beauty blender. This little fellow is brilliant! It gets right in to all the difficult areas like the corner of your eye and the side of your nose. It really does blend the product into your skin instead of dragging it around the skin like so many sponges do. To add even more glow or dewy finish sprits it with some MAC prep & prime or just add a dab of your favourite primer! 

                                                                                                                                  5. I then start on my contour. I use the third shade in on the bottom of the Crown palette as I don't like my contour to look too harsh, and my face is as pale so I don't need to go any darker than this colour unless I'm using tan. I apply this under my cheekbones and on my forehead in towards the hairline, I do this by using the Real Techniques foundation brush. I like to use separate brushes for my highlight and contour so the products don't all build into one. This brush is handy for contouring as it gathers the product easily because of it's large surface and it just glides on the face. 

To blend my contour out I use the Real techniques stippling brush. I use this brush because I find it doesn't move the product around to much which Is great for contouring as you do want it to blend but also for it to stay in place. 


6. I then go in with MAC bronzing powder in Golden, it gives a nice shimmer to the skin and adds to the depth of the contour. I apply this using this brush, I haven't a clue what the make is I've had it for years but I love it I'd say it's some cheap one from a chemist but it's one of the best brushes I have!                                                                                                                                                                                                                                                                                                                                                                        7. I then go over this with MAC Mineralize skinfinish powder in medium dark. I also use this on my nose, forehead, chin etc and also on my neck to blend it in with my now tanish face!! I use the same brush for this. If you'r feeling like a bit of cleavage, you can always contour around the boobs to give the appearance of a bigger bust! And under the collar bones apply a dark contour and on top a highlighter to make them pop .... hello skinny big boobs!! 


8. Last but not least is my favourite product ever MAC Soft & Gentle. I love love love this! It's an amazing highlighter, it's summer all over! I apply this above my cheekbone up into my temple, under the arch of my eyebrow, on the inner corner of my eyes and on the forehead. I use the Real Techniques contour brush for this. This highlighter really is amazing and with a tan it's just something else! I use it down the centre of my legs as well to add a nice shimmery look to my tan. You can also use it on your boobies to emphasise the shit out of them!! I then set my make-up using what ever I have at hand and that's it done! I know it seems like a lot, I don't do this every day only when I can be arsed! 


 I tried to get a decent picture of my face but the camera on my phone is so shitty it doesn't do it justice. And excuse the sexy nightgown but that bad boy is what I live in lately! 
Thanks for reading,
Love BV x


Sunday, 17 May 2015

Fringe Heels - Save | Spend | Splurge

Hi everyone, 
I've been doing some shopping and decided to do a save, spend, splurge post on some fringe heels. There everywhere at the minute and I found three pairs that are all fab with all very different price tags. It's so important to shop around before you buy something just to get the best value for your money and to make sure everything is in your budget. I actually sound like my mother, she would be proud! But I came across these three beauties which have all different price tags so I hope there's something for everyone. :) 


1. SAVE


How fab are these? These are the Jennie fringe heels from Public Desire. This website is actually amazing for shoes. They have all the latest trends, there's something for everyone. It's really up and coming and there smashing all the latest trends. These beauties are actually a knock off of the Zara fringe heels, they are £29.99 and a total save! 


2. SPEND

How amazing are these?? These are the fab fringed heels from Zara. There one of their best sellers at the minute so be quick if you's want them! They have the fringe detail and lace up detail all in one! You can purchase them from Zara for €69.95.


3. SPLURGE


These bad boys are from one of the best, Steve Madden and are called Fringly. Steve Madden is known for making the worlds comfiest heels, I actually wouldn't care if these killed my feet I'd still try and rock them! The open toe detail gives more room in the shoe and there is a zip at the back which helps add security. These babies are one for a good pay day and cost €115.00. 


You can purchase these at any of their websites which are listed below.
Happy shopping ladies,
Love Bv x


Friday, 15 May 2015

Beauty Post - Skincare


I'm having a super lazy day today so I decided to do a blog post on the skincare products that I've been using and loving during my pregnancy. I don't have a strict beauty regime at all, I've never really been able to use scented or high end products because my skin is so sensitive it would flare up if I ever changed my products. 


As I said in my previous post I have psoriasis and I have had it for as long as I can remember. It's the most annoying thing on the planet because you literally have no control over it what so ever. Pain in the arse! However through out the years I've learned what agrees and disagrees with my skin and I've been able to keep it at bay for periods at a time. For people who have psoriasis it is nothing to be ashamed off at all let me make that clear. I used to be so up and down when my skin was acting up and it would drive me insane. I couldn't wear certain clothes, make-up wouldn't look right, dyeing my hair was a mission in itself and it was just a horrible time, and don't get me started on the small minded gobshites who would make comments about it! Those kind of people are so small minded and ignorant, it makes my blood boil thinking about it! 

Since I became pregnant my skin just done a U-turn. It was quite irritated for a while but a few weeks into my pregnancy it just cleared up. The products that I'm using are ones that I've used for a while and I just find that they work best with my skin. 

1. Garnier Micellar Cleansing Water


I've been using this for a few months now since it came out really and I've found it great to take all my make-up off. I use it with some wee cotton pads and it really gets rid of everything. It's gentle on my skin and doesn't irritate it and leaves it feeling fresh and clean. The only thing I find is it doesn't get rid off all traces of eye make-up unless you really get in there and use a few pads, but over all a great product. It's also dermatologically tested. 


2. Lancome Bi-Facil 


One of my favourite products ever. This bad boy is the best thing ever for removing eye make-up. It removes every last bit of eye liner and mascara including waterproof products. It's gentle on the eyes and it doesn't sting and it doesn't leave an oily residue like some eye make-up removers. A bit on the pricey side but well worth the purchase. 


3. Vichy Purete Thermale Milk Cleanser (Sensitive-Dry Skin)


I only use this to cleanse and clean my skin not to take off make-up. I tried using it to do that but it wasn't taking it off properly. It does say that it's a cleanser, toner and eye make-up remover all in one but I wouldn't recommend it for taking your make-up off with, it just doesn't remove it completely. It's dermatologically tested and leaves my skin feeling so soft and soothed. 


4. La Roche-Posay Thermal Spring Water 


I love this product so much. I actually got it in the set and I love all the La Roche-Posay products. This product is an all rounder. I use it after cleansing my skin, after coming out of the shower I like to sprits it on to lock in moisture and I spray it on my face before I do my make-up, It's also great for setting make-up. In the summer it's great for when you need a freshen up. It locks in moisture, soothes and softens skin and contains natural antioxidant. 


5. Simple Moisturiser 


I think everyone has this in their press. It's a dead cert, it does exactly what it says, moisturises and leaves skin feeling soothed. It's dermatologically tested and contains a blend of multi-vitamins including vitamin E. It's unscented and contains no artificial perfumes or chemicals. I always use this before I put my make-up on, wait for  few minutes let it soak in and then apply the La Roche-Posay thermal water for a base. 


6.  Elizabeth Arden Eight Hour Cream 


The holy grail of beauty balms!! This stuff is just amazing. It's won numerous awards and it deserves every one of them. It can be used for anything. I love to layer it on at night before I go to sleep to give me a great complexion the next day. It's balmy texture does leave the skin feeling sticky that's why I use it at night time. It smells like bee wax not for everyone but  I love the smell. I also use it on my lips when they're dry, it works instantly. It's also great for softening cuticles and I use it on my heels when there feeling rough. It's great for your eyebrows as well, it helps them stay in shape. Make-up artists also use it to add shine to the eyelids and cheeks as a gloss. The list is endless really. Oh and it's great if your on a long haul flight it keeps the skin in perfect condition! 


7. Palmer's Cocoa Butter Massage Cream For Stretch Marks


I can't get enough of this ever since I became pregnant. I love getting out of the shower or bath and slathering this on. I've gone through countless number of tubes and I'd recommend it to any future mum-to-be. It's consistency is quite thick which I love because my skin is extra dry. It leaves skin feeling moisturised for hours and my skin feels so soft because of it. This one is specially for tummy, hips, thighs and bust, I've used it all along and thankfully haven't gotten any stretch marks. It contains vitamin E, Shea butter, bio C-Elast which is a combination of collagen, elastin and loads of other yummy ingredients.It's dermatologially tested, hypo-allergenic and paraben free. The smell is to die for and I feel like a princess when ever I have it on!! So stupid but it's the little things! I've also been using the cocoa oil as well all over my body and it gives a great shine to the skin and keeps it moisturised 24/7. Great product! 


8. The Body Shop Body Butter and Hand Cream


These products just feel so good on the skin. The rich creamy texture of the body butter just makes my skin feel so good.It's great for dry skin and adds a lovely sheen to the skin, great for putting on over fake tan to add a shimmer. The smell is just something else honestly I just want to eat it every time I put it on. I use this specially on my legs and arms and on my feet as well. The hand cream is handy for your handbag, my hands have became dry lately and I just pop some on whenever I need a bit of moisture. I actually bought the set which came with a shower gel and I've been using that as well, it just makes your skin smell so fruity! 


I hope this helps anyone with dry or sensitive skin and if anyone would like to know a bit more about my psoriasis and what other creams I use specifically for it just comment and let me know.
Thanks for reading,
Love BV xx


Thursday, 14 May 2015

Top 5 Maternity Jeans

Hi Ladies, 

As promised I've done a blog post on my top 5 maternity jeans of the moment.  I spent so long looking around for nice stylish jeans that where comfy so I hope you's find this helpful :)


1. Under Bump Skinny Ankle Grazer 


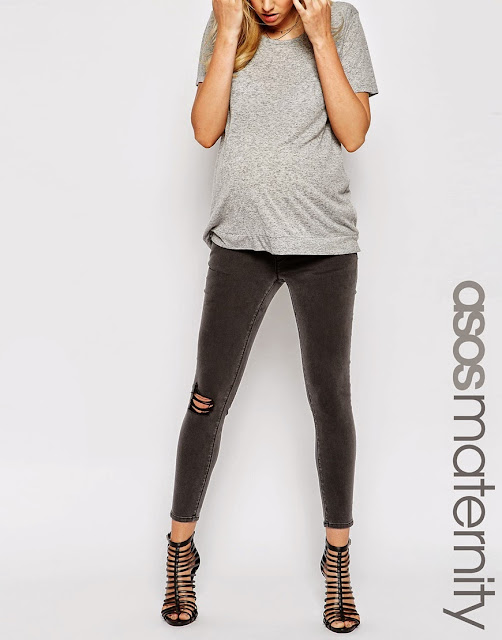
I just love these so much. How cute are they? you would never think these are maternity jeans. These would be perfect for throwing on going to the shops or even date night. So versatile! The ripped knee is huge at the minute and us pregnant ladies like to be stylish too! These are from ASOS and retail at 43.83 euro. 


2. Under Bump White Skinny


These beauties are so perfect for summer. White is all over the place and its just so fresh and clean feeling and looks great with a tan! These are also the under bump which actually gives your back great support. There a super soft material which always helps. These bad boys are from New Look and retail at 29.99. 


3. Over Bump Black Skinny


These are just a wardrobe staple for me. Black is just my go to colour, 90% of my wardrobe is black so I had to include them! These are the over the bump style and I find them great. You know when you just need to hoist your jeans up? Like you just need to give them a good reef for them to sit properly? Seriously unattractive but we all do it!! Well with these you just don't have that problem they just sit so perfectly on your bump and sometimes I think I'll never go back to normal skinnies after I have my little boy! Anyway's these are from New Look and cost just 22.99!! Steal!!!

http://www.newlook.com/eu/shop/maternity/jeans/maternity-black-overbump-jeggings_326150301?isRecent=true


3. Under Bump Ripped Boyfriend Jean


Boyfriend jeans are great for a casual I don't give a shit look. So comfy, so handy to just throw on with a pair of cons and away you go! These are actually from New Look but we're all out on our site so I found them on ASOS and there only 34.23!!


5. MAMA Jersey Trousers 


I know these aren't jeans but I just seen these on H&M when I was having a snoop and I fell in love. There probably not everyone's cup of tea but they are mine! I love the palm print and the colour, get me to Ibiza please!! I have a few pairs of these trousers and there the easiest thing to dress up or down. There's a matching top to go with these and it's such a nice two piece set. Throw them on with a floppy sun hat and some shades and Kimmy K wouldn't have a look in! These are cheap as chips and are just 19.99 from H&M.


Hope these gave you's some style inspo! 
Thanks for reading, 
Love BV x